


A photo booth photo kind of art – DIY

This post is a collaboration with Rebel Walls
Last year when we were roadtrippin’ on the American west coast we stayed at a great Ace hotel in Portland. In their lobby there is a photo booth that we naturally used. I mean what is not to love?! I think I have an old nostalgic view of photo booths. Remembering how of how it was back in the days when you actually had enough money to do it and it had to be perfect for your passport or whatever. Well this photo strip I, very subjective since it is my kids, think turned out awesome. And I’ve kept it on my fridge ever since.

We have this wall in our staircase at home that I’ve been wanting to do something cool with but the time has passed and I just didn’t do anything about it. It’s a weird space narrow and high about 1×3 meters. I was thinking about maybe put up some shelves to display a cool sculpture or make a hanging art piece or a awesome lamp. But didn’t find anything. But then one day the space talked to me – what is long and narrow like that? Well the photo strip!!

So I scanned the image and mailed it to Rebel Walls to print. They make all kinds of customized wallpapers from photos and artworks as well as having their own collections. Naturally blowing up the image like this would mean loosing some sharpness. A photo booth image isn’t that sharp from the beginning but I actually like the pixels like this – makes it cool and a bit old school. And from far you can’t really tell anyway.

Now I had to figure out how to hang it. I could’ve framed it or glued it straight to the wall but I wanted a feeling of it flowing. Or that it was a thin, actual strip only larger. I went to the lumber store and bought a 6mm MDF and I let them cut it at the right size straight away since I don’t have the tools for it at home. At the back I used regular studs (reglar 45×45) to get a distance from the wall. I screwed the studs from the front since 6 mm isn’t that much to get a nice grip, If I would’ve done it from the other side. I hade to put some putty on the screw heads and grind it when dry. (Snabb svensk översättning: Eftersom 6 mm mfd är så tunn måste man skruva från framsidan igenom mdf och in i reglarna. SEn var jag tvungen att spackla och slipa över varje skruvhål för att det inte ska synas genom tapeten).

I also painted the sides of the MDF in a dark grey that matched the photo. The sides – the MDF would be more as one with the photo. Since the wallpaper is a non-vowen I could glue straight on to the wood. And then just “hang it” as I would do if it was a wall. With such a small piece. It’s not so hard.

TA- DA!
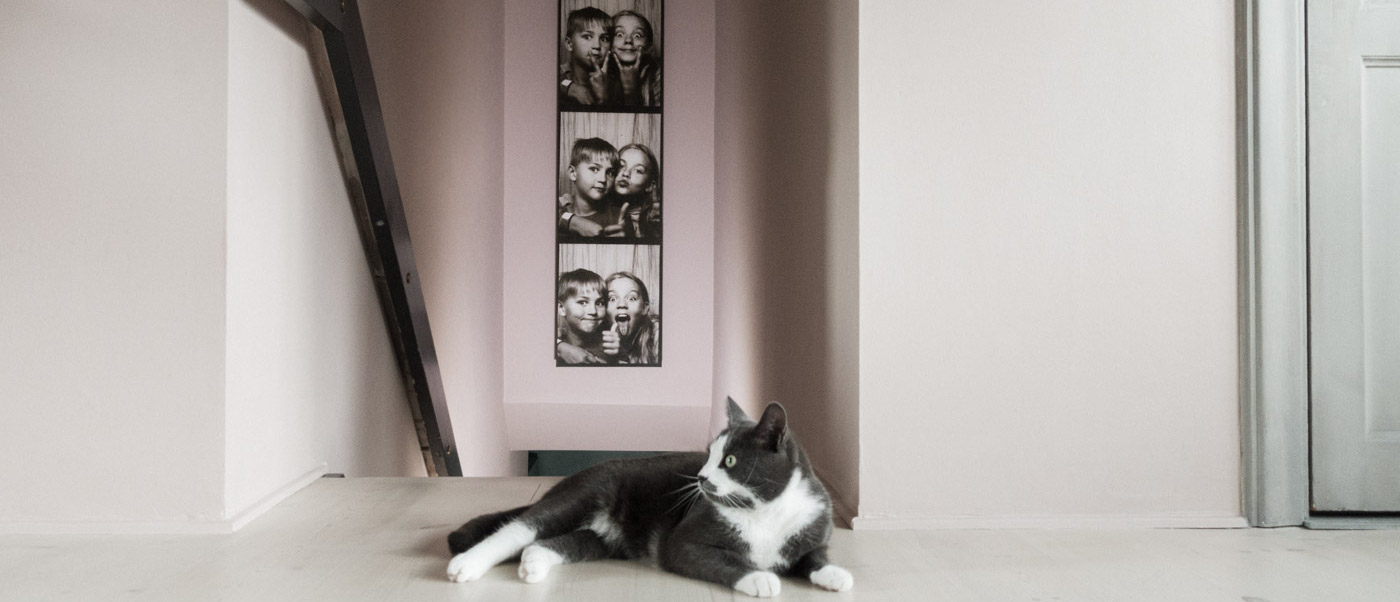
Here it hangs in the staircase. Looks cool – doesn’t it?
To take this photo I had to give the staircase som more light, when you are here at home it’s much more suggestive. There but not in your face! If we ever move I have to find an apartment with at least 2.30 to the ceiling to fit it!
xx
Isabelle
1 Comment
Join the discussion and tell us your opinion.
du e så bra!